And what does the Lord require of you but to do justly, and to love kindness
and mercy, and to humble yourself and walk humbly with your God? (Micah 6:8)

Monday, February 16, 2015

Watercolor Resist Tutorial

Hello sweet friends…it's Monday and that means it's time for a Design Diva Demo over at the Sweet 'n Sassy Stamps Blog!  It's my turn to share so I thought I would share here as well.   At the end of this month our church is having a women's retreat.  I'll be rooming with two precious ladies from our church, so I decided to make a set of notecards for each of them.  
  I love trying new techniques and the one I'm going to share with you today is the watercolor resist technique I used to make my set of notecards.


Start by gathering the supplies you need to make the notecards.  Choose colors and papers that coordinate.  I'm using Bo Bunny papers and the rose image from the new Parisian Postcard stamp set by Sweet 'n Sassy Stamps.

Supplies: Neenah Solar Crest Card Stock, Watercolor Paper, Designer Paper,
Matching Card Stock, Stamp Sets, VersaMark Ink Pad, Black Stamp Pad,
White Embossing Powder, Heat Tool,Watercolors or Ink Refills, Border Die,
paint brushes, twine
(Optional: Sewing Machine, Embossing Folder, Iron)
To prepare the card bases cut Neenah Solar Crest card stock to 4 1/4" x 11" and score at 5 1/2".


Cut watercolor paper into panels measuring 4" x 5 1/4".  I used Strathmore Cold Press Watercolor Paper for my project which has a smooth side and a textured side, but any watercolor paper or mixed media paper would work for this technique.


Stamp the rose from the Parisian Postcard stamp set on the smooth side of the watercolor paper with VersaMark ink and emboss with white embossing powder.  You could also use clear powder if you don't have white.  I plan where I want the stamping to go on a scrap piece of paper and use a stamp positioner to make sure the image is in the same place on all four cards.  Rub an embossing buddy over the watercolor paper before stamping to make sure the embossing powder sticks only where you want it to stick.  Click on any of the pictures to see a close up of the details.


Since these watercolors are new to me, I wanted to test the colors on scrap pieces of watercolor paper to make sure they would match my papers.


Now comes the fun part.  Use plain water to wet the areas where you want the color to be and drop the color you are using onto the wet area using a paint brush.  The water and the paint do all the work.  Start with the lightest color and keep adding darker layers for shading.  I am using a set of Kuretake Gansai Tambi watercolors, but you can use any watercolor set, distress inks, or stamp pad refills to do this step.  The embossing will resist the watercolor.  Don't be afraid to go outside the lines for a softer look.


Wait until each area is dry before moving onto the next part.  The flowers were dry before moving onto the leaves, and the background and splatters were added last.  Too much water can be dabbed off with a paper towel.  Remember…watercolors will dry lighter than they look while wet.  Each of my cards will be a different color.


I put my panels between two pieces of copy paper and ironed off some of the embossing to cut down on the shine.  If you decide to do this step, be sure to turn off the steam on your iron.  At this point, you can dry emboss your watercolored panels for extra texture if you want.  I used a Canvas Impression Plate on mine.  Now it's time to assemble the cards...I used one of my favorite layouts.  Cut border strips of DP to 1 1/4" x 5 1/4" and die cut matching pieces of card stock using the 


Attach the Doily Border to the DP strip and mount this to the left side of the watercolored panels.  I decided to stitch mine on since I love to sew on cards.


Now it's time for the finishing touches.  Sponge your edges.  Wrap some twine twice around the watercolor panel before attaching it to your card base.  The sentiments I used came from the fabulous Keep in Touch, Too stamp set which has tons of greetings perfect for any occasion.  The really cool thing about this sentiment set is that all the sentiments fit on one of the new Banner Dies!  Add a little twine bow and the cards are finished!


Wrap the finished cards in ribbon or package them however you want to give as a gift.  I made a little card purse to put mine in, but that is another tutorial for another time!  LOL!


Here are the supplies from the Sweet 'n Sassy Store that were used to 
make these cards:

I hope you enjoyed the tutorial.
Thanks so much for stopping by…have a marvelous Monday!

Hugs,
Cathymac

Thursday, February 12, 2015

Make a Joyful Noise

Hello friends!  I have another quick challenge card for you today.  The musical theme of the card came from the Splitcoaststampers' Ways to Use It Challenge for today.
Creative Nugget:  I took this card apart several times before ending up with this…ever do that?  The Faithful Fish Pattern Die was used to emboss the top of the background layer.  The bottom is KaiserCraft designer paper.  A Punched scallop border separates the two sections.   Amazing Grace was stamped in Watering Can Archival Ink and cut with a Rectangle Nestie for the second layer.  Finally the treble clef from the beautiful Just a Note stamp set by Our Daily Bread Designs was stamped, colored with Copic Markers, and cut with a Matting Basics Die from Spellbinders.  All of the layers were matted and stitched to Smokey Shadow or Blushing Bride.  Jute was colored with a Copic Marker to match, a bow made, and pearls added to finish the card.

Here are the supplies from the Our Daily Bread Designs Store used on my card for today:


The MOJO Monday sketch was used for the design of my card.

The shabby, vintage colors came from The Card Concept.

As always…I appreciate your visit!  Thanks so much for stopping by…have a wonderful day!

Hugs,
Cathymac

Wednesday, February 11, 2015

You Warm My Heart

Hello friends!  It is COLD out there, and there is nothing better on a freezing cold morning than a steamy cup of hot cocoa, so out came the adorable new Winnie's Warm Wishes stamp set just released by Sweet 'n Sassy Stamps to use for the Sketch Challenge on Splitcoaststampers today.

Creative Nugget:  Wintery papers by Fancy Pants were stitched to Scarlet Jewel card stock and used for the background and the crossed panels on the sketch.  The sentiment from Winnie's Warm Wishes was stamped and the square panel embossed with a snowflake Cuttlebug embossing folder.  A little Heart die cut was colored with Wink of Stella, covered with Glossy Accents and added to finish the sentiment.  Winnie was colored with Copic Markers and cut with one of the the Decorative Plaques Dies.  A bow made of metallic thread was added along with some rhinestones for some sparkle to finish the card.


Sweet 'n Sassy Stamps products used to make this card can be found here:

This card will be entered in the following challenges:
Sister Act Card Challenge -  #92 Anything Goes
Pile It On - #55 Use a Bow
Crafting From the Heart - Challenge 46 Anything Goes
Sweet Stamping Challenge - Add a Heart

Thanks so much for joining me today!  Keep warm…enjoy a cup of hot chocolate!

Hugs,
Cathymac

Friday, February 6, 2015

Welcome to SNSS February 2015 Release


Hello, sweet friends!  Welcome to the Sweet 'n Sassy Stamps February 2015 Release Day Blog Hop! It sure is cold outside, but our February release is sure to warm your heart so grab your favorite hot beverage and get ready to be inspired by the projects created for you by the talented Design Divas! 

You can find out all the details about each of the new stamp sets and dies on the Sweet 'n Sassy Stamps Blog, but here are several samples to inspire you using some of the new products:


Creative Nugget:  Can you believe that Winter with Winnie was designed by a high school student?  That's right, Wynne Gettelfinger designed Winnie, the adorable character who is so much fun to color up with Copic Markers.  Some snowy patterned paper, a few Small Snowflakes, and one of the new Speech Bubble Dies is all it takes to create a cold winter scene with a choice of some very fun sentiments!  The design for this card was taken from this week's Mojo Monday Sketch.

 SNSS products that were used to make this Winter with Winnie card:


Next up is a card made with one of the new critters designed by Diane Zechman in the Get Well Critters stamp set.

Creative Nugget:  This little chick with a wounded wing from the Get Well Critters stamp set is adorable and sure to perk up the hurting recipient with a smile.  Being able to cut out the image with the matching Get Well Critters Die makes creating a quick get well card a snap.  Just add some patterned paper, some embossing, a few sequins, and a fun sentiment!

SNSS supplies used to make this Get Well Critters card:


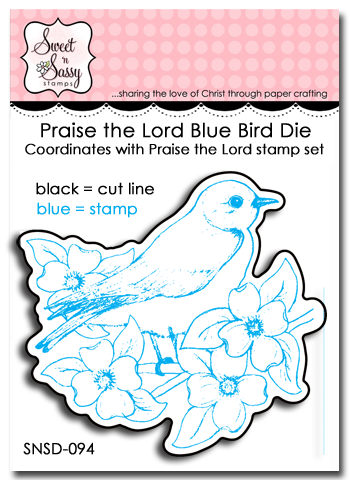
My last sample was made with the new remaining products being added to the Sweet 'n Sassy Stamps Store, Keep in Touch, Too, Banner Dies, and the Praise the Lord Bluebird Die.

Creative Nugget:  With the freezing weather outside, this card makes me feel like Spring is right around the corner.  The sentiments are all from Gloria Stengel's Keep in Touch, Too set and fit perfectly in some of the new Banner Dies.  Two of the banners were tucked behind the patterned paper strip and the third was popped up on top.  The bluebird is from the favorite Praise the Lord stamp set and was colored with Copic Markers and cut with the new Praise the Lord Bluebird Die.  A bow and some pearls finish the card.

These SNSS materials were used to make this card:

Release Giveaway!
What would a release be without a giveaway, right?  Well, here are the details of this month's release prize. One random commenter from one of the DT blogs will be selected to win a $10 Gift Code for  the Sweet 'n Sassy Stamps Store.  You have until Thursday, February 12th at midnight EST to leave your comments.  The winner will be posted on the Sweet 'n Sassy Stamps Blog on Friday, February 13th!

Last but not least...
We can't forget our fun Release Day Challenge!
Since the cold winter month of February often brings with it a case of the sniffles, create a warm get well card and join our...
"Warm Get Well Wishes Challenge"   

Just a few guidelines to remember as you play:
            
- You don't have to use a Sweet 'n Sassy Stamps image to enter (although we sure love when you do!)
- Please create a NEW card (no back linking)
- We ask that you enter your card in no more than 3 challenges
 - You'll have until Thursday, February 12th at midnight EST to enter

- We'll draw 1 winner from this week's challenge to receive a $10 credit to the Sweet 'n Sassy Stamps Store!  
If there are 25 participants, (not including the DT), we'll draw 2 winners!
- Please use code SNSFEB2015RC when uploading to Splitcoaststampers or other galleries 

To enter simply share a link to your creation below!

Thanks for joining us today!  Be sure to join us again on the Sweet 'n Sassy Stamps Blog on Friday, February 13th to see if you've won!

 Now it's time to see what the DT has created with these fabulous products! The DT blog links can be found in the Linky Tool below…
HAPPY HOPPING & SHOPPING! 

Wednesday, February 4, 2015

Wildflowers to Bless You

Hello everyone!  It's Wednesday and time for the Sketch Challenge on Splitcoaststampers.  I'm hosting today so I hope you can come play along.  Our Daily Bread Designs new Wildflower Silhouette Background was used for my sample.

Creative Nugget:  The Blooming Garden Paper Collection was used to make the panels for the sketch design and were matted and stitched to Golden Harvest and Wasabi Green card stock. The Wildflower Silhouette Background was stamped directly on the designer paper.  The Asters and Leaves Dies were used to make the flower and some Fancy Foliage was added for interest. Two of the Beautiful Borders die cuts were attached side by side with seam binding and a bow tied down the middle.  The sentiment from the new Life is a Gift stamp set was stamped on a Mini Tag die cut and attached to finish the card.

Here is the sketch that was used for the card design:


This card will be entered in the following challenges:
SC526 - Splitcoaststampers
Challenge #91 Anything Goes - Sister Act Card Challenge

Thanks so much for stopping by!

Hugs,
Cathymac

Sunday, February 1, 2015

ODBD February 2015 Release

Hello friends!  Everything's coming up wildflowers with the new February 2015 Release by Our Daily Bread Designs.  Wait until you see the gorgeous scenes created by the fabulous Design Team with the matching outline and silhouette images in this month's release. AND…Squeeeee…two new word dies! 

Three randomly selected winners will each receive a $25 gift certificate to the ODBD Store, to be used toward the purchase of ODBD Stamps found in the "stamps column" of the website just for commenting on the Design Team cards!  You have until February 2, 2014 at 9:00 p.m. EDT to leave your comments on the Designers' Blogs for a chance to win!  The Winners will be posted on the ODBD Blog on February 3rd, so be sure to check back there to see if you won!

Here is my first project made with some of the new products:
Creative Nugget:  Distress refill inks were used to create a sunset background for the new Wildflower Silhouette Background which was stamped over the dried watercolors with Versafine Onyx Black ink.  A white paint pen was used to add highlights to some of the wildflowers.  Another panel was made on Solar Crest card stock using the Faithful Fish Pattern Die released last month. The middle section was removed and the other two sections matted in black were popped up with foam tape allowing the wildflowers to be seen in the middle.  The Happy Birthday word die was cut once out of paper from the Blooming Garden Paper Collection and three times from black card stock.  The die cuts were glued together for dimension and mounted across the center section of the card. The same was done with the ballon dies which are included in the Happy Birthday Die Set.  The balloon was colored with Wink of Stella for some sparkle and covered with a layer of Glossy Accents.  A Metallic thread bow was added to finish the card.

My second sample was made with both the Wildflower Silhouette Background and the coordinating images from the Life is a Gift stamp set.

Creative Nugget:  Each section of the center step card base was layered with Neenah Solar Crest card stock and paper from the Blooming Garden Paper Collection.  The Wildflower Silhouette Background was white embossed on the two side panels directly onto the patterned paper.  Copic Markers were used to color the wildflowers from Life is a Gift and then the Vintage Labels Die was used to cut the panel.  The same die was used to cut a blue mat which was cut down the middle and separated a little to create a frame for the main image.  The Gilded Gate die cut was embossed and lightly sponged with distress ink and mounted to the front of the card.  The sentiment from Life is a Gift was stamped on a Mini Tag die cut and tied to the gate to finish the card.

Here are the new release products available at the 
Our Daily Bread Designs Store used on my projects…


…and some old favorites as well:

To see all of the fabulous Design Team projects in one place, head on over to the Our Daily Bread Designs Blog.  The links below will take you to each of the talented Breadsticks' Blogs for a close up of all the details.

 Cathy (me) * Lori * Sandee * Dawn * Julie
 Grace * Chris * Lisa * Angie * Silke  
Wanda * Sabrina * Audrey

Thanks so much for stopping by!

Hugs,
Cathymac