Tuesday, June 26, 2018

Texturize It!

Hello friends!  Hope your week is off to a great start.  I love adding texture to cards!  Whether it's bricks, wood grain, pebbles, or tree bark, the new Texture Tiles 2 stamp set from Sweet 'n Sassy Stamps is a must have for creating that perfect texture.  These cards are being shared over on the SNSS Blog as well.

Creative Nugget:  The brick tile from Texture Tiles 2 was stamped on a Gelli Print scrap found in my scrap file to create the brick wall.  Check out how realistic it looks!  The flowers are from the Pretty Potted Florals stamp set and were Copic colored, cut out, and popped onto the wall.  A sentiment was added from the Scripty Thoughts stamp set along with some sequins to finish the card.

Creative Nugget:  How about some tree bark?  Drag several shades of Distress Ink down the length of some card stock and stamp the wood grain tile with a darker shade.  A background was created with Distress Oxide inks and the pebbly tile from Texture Tiles 2.  The adorable birdie, clouds, and sentiment are all from the How Tweet stamp set.

These cards will submitted for the following challenges:


Thanks so much for stopping by!  I hope I've inspired you to try stamping some texture on your next creation!

Hugs,
Cathy

Two For Tuesday: Lacey Corners Die

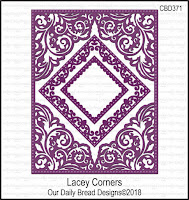
Hello friends!  It's time for another Two for Tuesday feature over at the Our Daily Bread Designs Blog.  The new Lacey Corners Dies were used on both the CAS and the stepped-up versions.


Creative Nugget:  The white and lavender layers were cut with a combination of Lacey Corners and Pierced Squares Dies and layered onto the card.  A few pearls colored with Copic Markers were added to finish the CAS version.

Creative Nugget:  Papers from the Shabby Rose Collection and Shabby Pastels Paper Pad were added on the stepped up version as well as butterflies from The Greatest Gift Stamp/Die Duo.  The floral embellishment was cut with the Asters and Leaves Dies and the Ferns Dies.  A few pearls and Frosting Powder on the flower were added to finish the card.

Be sure to hop on over to the ODBD Blog to see more Two for Tuesday creations!

These cards will be submitted for the following challenges:


Thanks so much for stopping by!  

Hugs,
Cathymac

Friday, June 15, 2018

Taking Another Look at the ODBD June 2018 Release

Good morning, friends!  Today we are taking another look at the ODBD June 2018 Release.  I have a few projects to share with you using the Brother in Christ stamp set and the God's Beauty Coloring Pages.


Creative Nugget:  The Center Step A2 Card Dies and the Center Step A2 Layers Dies were used to create the base of the card.  Distress Inks were used to sponge a background and the fishing image from the Brother in Christ stamp set  was stamped on the panel.  The sentiment was stamped on a panel cut with the Lacey Corners Die and a Square Die.  The Fence Die was used to cut a border for the bottom of the card.


Creative Nugget:  Copic Markers were used to color the mums on the God's Beauty Coloring Page.  A sentiment from the Sister Time stamp set was added to panels cut with a Vintage Border Die and a Vintage Label Die.  Papers from the Fall Favorites Paper Pad were used as a border cut with the Flower Lattice Die and a mat for the white Pierced Rectangle layer.  Finally, one of the Layering Hearts Dies was used to add the little red heart to the sentiment label to finish the card.


Be sure to check out the Our Daily Bread Designs Blog, Facebook Page, and Instagram to see more beautiful samples created by the Breadbasket Designers.

These cards will be submitted for the following challenges:

Thanks so much for stopping by...hope you were inspired!

Hugs,
Cathymac

Wednesday, June 13, 2018

Two for Tuesday: By the Sea

Hello friend!  It's time for another Two for Tuesday feature over at the Our Daily Bread Designs Blog.  The By the Sea stamp set was used for both the CAS card and the stepped-up version.


Creative Nugget:  The Fishing Net Background was white embossed on watercolor paper and watered down Distress Inks were applied.  Another panel was masked and sponged to create a background for the pelican from the By the Sea stamp set.  Pierced Rectangle and modified Pierced Square Dies were used to cut each of the panels.  Kraft card stock, jute twine and a border cut with the Trellis Strip Die were added to finish this CAS version.

Creative Nugget:  Papers from the By the Shore Collection were added to two of the panels on this stepped up version.  The Praying Border Die, now back in stock, was used to create a border down the right side of the card.  

Be sure to hop on over to the ODBD Blog to see more Two for Tuesday creations!

These cards will be submitted for the following challenges:

Thanks so much for stopping by!  

Hugs,
Cathymac

Tuesday, June 12, 2018

That's Flamazing!

Hello friends!  Today I am sharing some flamazing cards using the new I'm a Flamingo stamp set over on the Sweet 'n Sassy Stamps Blog and thought I'd share here as well.  The flamingo in this set is just too cute!

Creative Nugget:  The water on the background was white embossed using one of the stamps from the Texture Tiles 2 stamp set.  The scene was masked and sponged with Distress Inks.  The flamingo and leaves were colored with Copic Markers and the wing on the flamingo was paper pieced.

Creative Nugget:  The leaf from the Be a Flamingo stamp was white embossed repeatedly over a panel of watercolor paper and then watercolored.  Then the leaf was stamped over the panel with Archival Ink.  Three tags were die cut from this panel.  A masked off strip on the background...hard to see behind the tags...was stamped using one of the Texture Tiles 2 stamps.  The Copic colored flamingo and hibiscus were cut out and popped onto the tags to finish the card.

Be sure to check out the SNSS Blog for more details on these flamazing stamp sets!

These cards will be submitted for the following challenges:

Try Stamping' on Tuesday - Color Challenge #3


Cathy

Thursday, June 7, 2018

ODBD Throwback Thursday - Dresden Quilt Die

Hello friends! Today is Throwback Thursday over at Our Daily Bread Designs  and the featured die for today is the Dresden Quilt Die.  Don't you just love getting all cozy wrapped up in a quilt with a hot mug of coffee...or in my case, hot chocolate!  The Dresden Quilt Die makes a perfect background for a warm, cozy card!  

Creative Nugget:  Latte Love Papers were cut with the Dresden Quilt Die and pieced back together to make the quilt.  The quilt was tucked into Lacey Corners die cuts on two of the corners. and a sentiment from the Quilted With Love set was added on a Pennant Flag.  The Hug in a Mug Stamp/Die Duo was used to create the coffee mug which was popped onto the card. Stitching was added for the finishing touch.


To see more samples using the Dresden Quilt Die head on over to the Our Daily Bread Designs Blog.

This card will be submitted for the following Challenges:

A Perfect Time to Craft Open Challenge #6
Craftaholics R Us Challenge #23 - Love You Cards
Crafty Hazelnut's Patterned Paper Challenge - June 2018

Thanks so much for stopping by!  Take time enjoy a cuppa with a friend! 

Hugs,
Cathymac

Friday, June 1, 2018

Welcome to the ODBD June 2018 Release

Good morning, friends and welcome to the Our Daily Bread Designs June 2018 Release.  If you love stamping with silhouette images, this release is for you.  Get ready to see beautiful silhouettes perfect for feminine and masculine cards AND some dies perfect for framing them.

My first sample was made with the new Sister in Christ stamp set and the Flourishy Frame Die.

Creative Nugget:  Papers from the Romantic Roses Paper Pad were used for this card.  The image from the Sister in Christ stamp set was stamped directly on one of the papers.  The paper for the front was cut with a Pierced Rectangle Die.  A Square Die and the Flourishy Frame Die were used to frame the image.  The sentiment was embossed on a Pierced Circle die cut and matted to a Filigree Circles die cut.  Pearls and ribbon were added to finish the card.

My second sample was made with one of the pages from the God's Beauty Coloring Pack

Creative Nugget:  Copic Markers were used to color the flowers on the page.  Papers from the Boho Bolds, Plum Pizzazz, and the Christmas Coordinating 2015 Paper Pads were used.  Pierced Rectangle Dies and one of the new Lacey Corners Dies were used to cut the papers.

These new products from the Our Daily Bread Designs Store were used to create the cards above...

Be sure to check out the Our Daily Bread Designs Blog, Facebook Page, and Instagram to see more beautiful samples created by the Breadbasket Designers using products from the June release.

These cards will be submitted for the following challenges:


Thanks so much for stopping by...hope you were inspired!

Hugs,
Cathymac