Saturday, June 29, 2013

Making Waves

Happy Saturday friends and stampers!  Hope you've had a wonderful week.  Yesterday I spent the day going on a Best Kept Secret Tour with two very special friends.  We had a marvelous time traveling to the different shops, eating way too much, and spending more than I should have, so now it's time to get back to my daily routine...for today that means bringing you the new sketch at The Sweet Stop!

Yesterday Sweet 'n Sassy Stamps released three new die sets for the summer. I used one of the die sets for my sample today and decided to make some waves.  


Creative Nugget:  Fancy Pants DP and Pacific Point card stock were used to create the panels for the sketch.  The waves were cut with the new Wave Dies set, the panels attached to Solar Crest and stitched to Pacific Point, and everything mounted to a Solar Crest card base.  The main image from the Ocean Paradise stamp set was stamped and colored with Copic Markers except for the umbrella which was paper pieced.  This image and the Pumpkin Pie matt were cut with Classic Circle Nesties.  One of the wonderful attributes of clear stamps is that they can be curved on the acrylic block to fit the contours of your card as was done with this sentiment from the Kindness stamp set.  The shells from the Beauty by the Sea stamp set were colored, fussy cut, and covered with Glossy Accents to finish the card.  Now I'm ready for the beach!

I hope you are ready to join us for this week's SSS217 challenge. We have plenty of inspiration for you.  Just check out the sketch and some amazing samples made by the Sugar Babies!
Sugar Babies

Faye Winn-Jones (on vacation)
Stephanie Serrano


I so appreciate everyone who visits...thanks for stopping by! Have a wonderful weekend!  

Hugs,
Cathymac

Card Recipe
Stamps: Ocean Paradise, Beauty by the Sea, Kindness (SNSS)
Ink: Tuxedo Black (Memento), Stormy Sky, Wild Honey, Walnut Stain Distress Inks (Ranger)
Paper:  Solar Crest (Neenah), Pacific Point, Pumpkin Pie (SU!), Fancy Pants DP
Accessories: Waves Die Set (SNSS), Classic Circle Nesties (Spellbinders), Glossy Accents (Ranger), Sew Mini (Janome), Copic Markers B0000, B00, B02, B32, B34, B37, BG05, YG13, YG17, YG21, YG25, E00, E31, E33, E35, E50, E51, E53, E97, E99, T0

Friday, June 28, 2013

SNSS Summer Die-Version Blog Hop

Now that summer is finally here, how about a little diversion...that is...a Die-Version!  Welcome to the 
Sweet 'n Sassy Stamps Summer Die-Version Blog Hop! We are so thrilled to bring you 3 fabulous new die sets today plus oodles of eye candy for your creative taste buds.  :)

Before we get to sharing the pretties, check out these wonderful new dies!

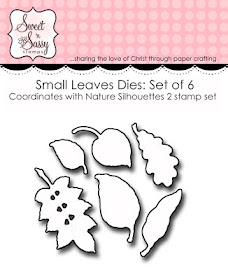
Small Leaves Dies  $6.25
Shape Dies  $19.75

Wave Dies  $8.50

How fun are they?!  Wait till you see what the Design Team has done with these dies!

Here's what I created using the new
Small Leaves die set:

Creative Nugget:  This card uses the sketch from the Sketch Challenge on SCS this week.  The background  was made with several layers of Dylusions ink sprays.  The little diamond pattern was sponged through a stencil with Peeled Paint and Gathered Twigs Distress inks.  The Queen Anne's Lace from the Nature Silhouettes 2 stamp set was double stamped with Early Espresso Ink to create a shadow and dotted with a white gel pen.  The little leaves were die cut from a variety of left over scraps from my mixed media experiments.  Some of the leaves were embedded using the Canvas Impression Plate and other were popped up for dimension.  The banner was hand cut from Bo Bunny DP and layered onto Early Espresso card stock.  The sentiment from the Prayerful Thoughts stamp set was stamped on the hexagon from the Shapes Dies set.  A ltttle twine bow finishes off the card.

This next fun card was made with the Shapes Dies!

Creative Nugget:  The hexagon shapes were again cut from scraps of DP and mixed media paper and layered onto True Black hexagons...what a good way to use up those scraps!  The sentiment and bees from the Bee Happy Rhubarb stamp set were stamped between the hexagon shapes and embossed with the Canvas Impression Plate.  Gingham ribbon was tied in a bow around the card front which was matted in True Black and mounted to a Golden Harvest card base.  Rhubarb was colored with Copic Markers, fussy cut, and popped onto the card.  Stickles glitter was added to the wings to finish the card!

To see my card made with the Wave Dies set you will have to stop back tomorrow for The Sweet Stop challenge where we will have another wonderful sketch to spark your creativity!

Be sure to comment at each stop along the way for a chance to win one of our new die sets!  We will be awarding 3 winners one of the new die sets!

Thanks so much for stopping by!  Happy Hopping!!

Hugs,
Cathymac


Tuesday, June 25, 2013

ODBDSLC160 Patriotic or Red White, and Blue

Welcome everyone, and a happy Tuesday to you all!  Looks like rain is in our forecast for most of the week, so I'll probably be spending a lot of time inside!  If that's true for you as well, and even if it's not, come join us for the Shining the Light Challenge at the Our Daily Bread Designs Blog and have some fun working with red, white, and blue!
This week's challenge is:
Patriotic or Red, White, & Blue
This will be a two week challenge.


To make the challenge even more fun, we will be giving out a PRIZE, a $15 gift certificate to be used toward stamps at the Our Daily Bread Designs Store!!  Entries for the prize must be submitted by Sunday, July 7 at 8 p.m. EST. One random winner will be chosen and announced with the next challenge.  In order to win this prize, you do not need to use ODBD stamps, but if you have them, we would love to see them!

As a way of recognizing those who do use Our Daily Bread Designs stamps, we will again be choosing three or more of our participants for the Shining the Light Award.  In order to qualify for this award, you must use Our Daily Bread Designs stamps and have your submission added to Mr. Linky by Sunday, July 7 at 8 p.m. EST.  If you upload your creation to Splitcoaststampers or any other online gallery, please use the keyword ODBDSLC152.  When creating your posts on blogs, please include a link to the challenge.  Thank you!  We love seeing your creations!

Before I post my card for this week's challenge, I have some exciting news!  While I will be participating in the challenges from time to time, I will no longer be on the Challenge Team...but will be moving to the Design Team!
   Now...onto my card for this week!


Our Daily Bread Designs, Not Forgotten
Creative Nugget:  The background for this card was made by distressing and stitching three panels, one from Fab Scraps, one from embossed Rustic White, and one from The Paper Loft, to Cherry Cobbler and Night of Navy card stocks and then attaching it to a Rustic White card front.  The main image from the Not Forgotten stamp set was stamped in Night of Navy and cut with an A2 Matting Basics Die by Spellbinders.  A little sponging and distressing was done to age the panel.  The postal mark in the corner was white embossed on Night of Navy card stock and popped onto the card.  The banner was cut with a square punch and the sentiment from the same set stamped in Cherry Cobbler. The star stickers, which were gold, were colored with a Copic Marker and added to finish the card.


This wonderful patriotic stamp set is available at the 

For more gorgeous Red, White, and Blue inspiration, be sure to check in with the rest of the talented Challenge Team Sisters.  Be sure to leave some love on their blogs, especially for Kathy Roney who will be stepping down from the team. We have enjoyed seeing her creations each week for the past year and she will be greatly missed!

Hope to see you over at the Our Daily Bread Designs Blog for ODBDSLC160!

and Guest Designer, Cheryl Scrivens

Thanks so much for stopping by...have a blessed week!

Hugs,
Cathymac

Card Recipe
Stamps: Not Forgotten (ODBD)
Ink: Cherry Cobbler, Night of Navy, Barn Door, Walnut Stain, and Gathered Twigs Distress Inks 
Paper: Rustic White, Night of Navy, Cherry Cobbler, Fab Scraps DP, The Paper Loft DP
Accessories: Spellbinders Matting Basics Die, Sew Mini, White Detail Embossing Powder, Square Punch, Star Stickers

Tuesday, June 18, 2013

ODBDSLC159 Sketch

Hello everyone!  Hope your week got off to a good start. Here it is Tuesday again and time for another Shining the Light Challenge and this week Chris has a sketch for us!
This week's challenge is:
A Sketch

To make the challenge even more fun, we will be giving out a PRIZE, a $15 gift certificate to be used toward stamps at the Our Daily Bread Designs Store!!  Entries for the prize must be submitted by Sunday, June 23rd at 8 p.m. EST. One random winner will be chosen and announced with the next challenge.

While it is not required to use Our Daily Bread Designs images and sentiments, we would love to see them if you have them.  As a way of recognizing those who do use Our Daily Bread Designs stamps, we will again be choosing three or more of our participants for the Shining the Light Award.  In order to qualify for this award, you must use Our Daily Bread Designs stamps and have your submission added to Mr. Linky by Sunday, June 23rd at 8 p.m. EST.  If you upload your creation to Splitcoaststampers or any other online gallery, please use the keyword ODBDSLC159.  When creating your posts on blogs, please include a link to the challenge.  Thank you!  We love seeing your creations!

Here's my card for ODBDSLC159:

Creative Nugget:  The front of the card was made by stamping the Fishing Net Background with Wild Honey Distress Ink on a Harvest Gold panel.  A little sponging with the same ink was done around the edges before matting it on True black card stock and attaching it to a Harvest Gold card base.  The lighthouse image from the Keep My Lamp Burning set was masked and the sky sponged with distress inks.  Some Coloring with Copic Markers was done to finish the second panel.  More masking and sponging was done to create the ocean scene.  The fishing boat from The Waves on the Sea set was stamped with the help of a stamp positioner.  This panel was cut with a Spellbinders Classic Oval, mounted to a Terracotta Tile Opulent Oval Die, and then to a True Black Memory Box Die.  The oval was switched to the other side of the card from the sketch to accommodate the images.  The Compass was stamped again and fussy cut to pop up on the front of the card.  The banners were hand cut.  The sentiment from the All Occasion Sentiments stamp set was stamped onto vellum and stitched to the card front.  A few pearls finish the card.

Here you can find the supplies used from the ODBD Store!


For more fabulous samples for your inspiration, check out my fellow Challenge Team Members  Hope you can join us this week over at the Our Daily Bread Blog for ODBDSLC159!

and Guest Designer, Cheryl Scrivens 

Thanks so much for stopping by!  Have a wonderful week!

Hugs,
Cathymac

I've Got Your Number

Welcome back to the fourth and final Sweet 'n Sassy Stamps June Release Feature Hop!  Today's feature has a matching die set which will make creating special occasion cards requiring the use of numbers a snap.
Today's feature is:
I've Got Your Number


This wonderful set with matching dies is perfect for scrapbooking and card making.  You'll find endless uses for these large numbers.
  • Stamp set includes 20 Number stamps
  • Set measures approximately 6" x 8"
  • The number images measure approximately 1" x 1 5/8"
  • Designed by Korin Sutherland
  • Stamp set is priced at $26
  • Die set is priced at $22.75
  • Or get them both for just $46 in the I've Got Your Number Bundle
Since I now have a new great niece, this is the card I made with this versatile set:

Creative Nugget:  This set works so well with all the new birthday sets that were released back in April!  The confetti stamped randomly on the background in colors matching the banners cut from My Mind's Eye DP and the sentiment were made with stamps from the Birthday Bash stamp set.  The number one was die cut and stamped with the matching number 1 in the I've Got Your Number stamp set.  The st is from the Celebrating Milestones stamp set.  The Lacey Eyelet Border Die was threaded with dyed seam binding and a matching bow attached.  A few buttons finish the card.  Now I'm all ready for Baylee's first birthday!
Click on the thumbnails below to see more amazing samples created by the Sweet 'n Sassy Design Team!

Be sure to leave a comment on each blog along the way because we're giving away this fabulous bundle to one lucky commenter!

The deadline to comment for a chance to win is Friday, June 21, 2013 at midnight EST. The winners will be announced on our website homepage on Monday, June 24, 2013!

Thanks so much for joining us for all the feature hops...enjoy your day!

Hugs,
Cathymac

Monday, June 17, 2013

Flower Blocks 2

Hello again sweet friends!  Have you been enjoying 
Sweet 'n Sassy Stamps new release features so far?  If you like floral images, you are sure to love today's hop.  The first Flower Block stamp set was a huge success.  The images in that set are perfect for coloring, sponging, paper piecing, and even 3-D paper piecing.  Now we have even more of your favorite flowers to play with!
Today's feature is:
Flower Blocks 2


This is the second set in our Flower Blocks series.  These bold and beautiful blooms...a Wild Rose, a Petunia, a Lotus Flower, and a Daisy...make perfect focal images and can be easily paper pieced or colored.

  • Stamp set includes 4 images and 4 sentiments
  • Set measures approximately 6" x 8"
  • The images measure approximately 2 5/8" x 2 5/8"
  • Designed by Korin Sutherland
  • Stamp set is priced at $26

Since daisies are my favorite flower, that's the one I chose for my sample.

Creative Nugget:  The background for this card was made on paper from a mixed media pad.  Bubblegum Pink and Pure Sunshine Dylusions were sprayed on the paper, dried, and sprayed again to build up the color.  The extra color left on the craft mat was sprayed with water and dabbed onto a tag which was used for the focal image.  The paper was randomly stamped with the Daisy Flower Block using Jet Black Archival Ink.  This was cut to size and stitched to True Black card stock and mounted to a Golden Harvest card base.  A strip of Bo Bunny DP was stitched to True Black card stock that had been punched with an e.k. Success border.  The daisy image was stamped on the tag and the center watercolored with Walnut Stain Distress Ink.  This was cut with a Square Nestie and mounted to a Spellbinders Marvelous Square Die.  Some Lemon Drop Baker's Twine and pearls finish the card.

This second card was made with some of the left over scraps.

Creative Nugget:  Even though this card was made with the same scraps as above, it has an entirely different look.  On this card you can see some of the leafy ghosting which was done by spraying water through a mask.  The water removed some of the Dylusions ink creating a ghost image.
To see more fabulous samples created by the talented Design Team, click on the thumbnails below!

Be sure to leave a comment on each blog along the way because we're giving away this fabulous stamp set to one lucky commenter!

The deadline to comment for a chance to win is Friday, June 21, 3013 at midnight EST.  The winners will be announced on our website homepage on Monday, June 24, 2013.

Thanks so much for stopping by!  Enjoy the hop!

Hugs,
Cathymac

Sunday, June 16, 2013

Sweet Kiwi

Smile friends!  It's Sunday, the beginning of a new week, AND Day 2 of Sweet 'n Sassy Stamps new release features!
Today's feature is:
Sweet Kiwi


This cutie-patootie koala is sure to make anyone smile. Create adorable summer picnic invitations or just brighten someone's day with a sweet summer greeting!
  • Stamp set includes 1 image and 9 sentiments
  • Set measures approximately 4" x 4"
  • The koala image measures approximately 2 3/8" x 2"
  • Designed by Korin Sutherland
  • Stamp set is priced at $11


This adorable image is perfect for a shaped card!


Creative Nugget:  The base of the card was made with Solar Crest card stock cut into a half circle on the fold with my Creative Memories cutting system.  Concentric circles were cut out of Garden Green, Green Galore, and lilybeedesign DP and cut in half to match the base.  These layers were then stitched together. Kiwi was stamped on Solar Crest, colored with Copic Markers, and cut with a Spellbinders Classic Circle die.  After applying the bow and sentiment the card was off balance and tilted to the right, so the Fence and Grass Die Set was used to balance the card.  A few punched flowers, pearls, and seeds cut with the Clouds and Raindrops Dies to finish the card.  Doesn't this card just make you want to SMILE! :)

Click on the thumbnails below to see more amazing samples created by the Sweet 'n Sassy Design Team!


Be sure to leave a comment on each blog along the way because we're giving away this precious stamp set to one lucky commenter!

The deadline to comment for a chance to win is Friday, June 21, 2013 at midnight EST.  The winners will be announced on our website homepage on Monday, June 24, 2013.

Enjoy the rest of the hop and have a wonderful Sunday!

Hugs,
Cathymac

Saturday, June 15, 2013

North Coast Creations June Release

This is my second post for today, so if you are looking for The Sweet Stop sketch challenge, please scroll down to the next post or click HERE!  

Welcome to a new release by North Coast Creations, sister company to Our Daily Bread Designs!  If you like working with silhouette images, you will love the three sets being released this month!  

This month we will be choosing 2 winners who will receive a $10 gift certificate to the North Coast Creations Store for stamps just for commenting on our Design Team cards! You have until June 17, 2013 at 9:00PM EDT to make a comment on each of our designers blog posts.  Our 2 random winners will be announced on the North Coast Creations Blog on June 18, 2013.

I LOVE working with silhouette images, so creating samples for these new sets was especially enjoyable...hope you like them!
Creative Nugget:  This first sample was made by simply embossing the image from the new Something Marvelous stamp set using white embossing powder directly on the beautiful Secret Garden DP by Graphic 45.  Two different patterns from the paper pad were mounted and stitched to Winter Wisteria and Solar Crest card stocks and attached to a Solar Crest card base.  The clouds, also from the same set, were embossed on the DP, fussy cut, and popped onto the card.  The sentiment was stamped on a hand cut banner.  A white bow was added to complete the card.

Here's another one using the 

Creative Nugget:  For this sample I used the Speckled Gesso Resist Technique.  Gesso was lightly applied to a Manilla Tag using a credit card.  After the Gesso had dried, Mustard Seed, Wild Honey, and Barn Door Distress Stains were applied and misted with water to blend the colors.  The Gesso resisted the stains leaving the white specked look you see on the card.  The edges were sponged with Gathered Twigs and Walnut Stain Distress inks to tone down the bright colors and age the panel.  The silhouette image was stamped in Jet Black Archival Ink over the top.  The sentiment was stamped on a panel prepared using the same technique but with Peeled Paint stain.  Several Bo Bunny papers were stitched to a True Black panel and mounted to a Harvest Gold card base.  Button twine, a button, and several black pearls were added to finish the card.  Love how this one turned out!

Here is the beautiful Something Marvelous stamp set:


Another set being released this month is 

Creative Nugget:  Believe it or not...this is a single layer monochromatic card...something I hardly ever do since I do love my layers!  The top of the Solar Crest card base was masked and the Gingham Background from Our Daily Bread Designs was stamped at the bottom of the card with Versafine Onyx Black ink. The silhouette image was stamped above the Gingham using the same ink.  Pearls were added to the centers of the wildflowers. The sentiment was stamped to the left of the image.  Some score lines, piercing, and Baker's Twine finish the card.

I enjoyed making this card so much that I made a whole set of cards in different colors using each of the sentiments from the set.


Here's a peek at the complete 


The talented Coasters have been working very hard to create gorgeous samples for you with the sets from this release.  Be sure to check out their blogs and leave a comment to be eligible to win a PRIZE!


Thanks so much for stopping by.  I hope you've enjoyed your visit...have a marvelous day!

Hugs, 
Cathymac

It's a Girl Thing

Happy Saturday sweet friends!  Not only is today's post for a new sketch at The Sweet Stop , but also for a new June release feature by Sweet 'n Sassy Stamps!

Since it's the third week of the month, SSS215 has a spin and a chance to win a PRIZE!  The spin is, It's a Girl Thing, and the prize is a $15 gift certificate to the Sweet 'n Sassy Stamps Store!  Make a girly card and post it to The Sweet Stop gallery for a chance to win!

This is also Day 1 of Sweet 'n Sassy Stamps June Release Features!
Today's feature is:
It's a Girl Thing


This adorable set with matching dies is perfect for those frilly, girly cards we all love.  Create fun spa or dress-up birthday party invitations, girls night out invitations, or just cheer up your friends by letting them know how beautiful they are on the inside and out.  There are many possibilities with this versatile set and matching dies.
  • Stamp set includes 8 images and seven sentiments
  • Set measures approximately 4" x 4"
  • The dress image measures approximately 1 3/8" x 2 5/8"
  • Designed by Korin Sutherland
  • Stamp set is priced at $11
  • Die set is $9.75
  • Or get them both for just $20 in the It's a Girl Thing Bundle

Here is my card using It's a Girl Thing and SSS215:


Creative Nugget:  Beautiful Secret Garden papers by Graphic 45 were used to create the panels for the sketch and for the paper piecing.  The papers were stitched to Gumball Green card stock and mounted to a Solar Crest card base.  The small Scallop Border Die was stitched to the horizontal panel which had been stamped with purses and shoes, paper pieced, and colored with Copic Markers. The dress was stamped, paper pieced, popped onto a Decorative Plaque Die, and attached to a hand cut banner.  The sentiment was stamped on a Mini Tag Die and attached to the dress along with a mulberry paper rose.  Pearls, buttons, and a stained seam binding bow were added to complete the card.

Check out the talented Sugar Babies for more wonderful inspiration for this sketch and join us this week at The Sweet Stop!


Sugar Babies

Ann Tuck
Ceal Pritchett
Cynthia Olheiser
Debbie Owens
Faye Winn-Jones
Jamie Moore
Marlena Peduzzi
                                               Melissa Schultz
                                               Monika Davis
                                               Robin Parker
                                               Stephanie Serrano

Here's a card that was posted yesterday that also uses It's a Girl Thing and the Girly Girl Dies


To see more fabulous samples created by the talented Design Team, click on the thumbnails below!

Be sure to leave a comment on each blog along the way because we're giving away this wonderful stamp set to one lucky commenter!

The deadline to comment for a chance to win is Friday June 21, 2013 at midnight EST.   The winners will be announced on our website homepage on Monday June 24, 2013.

Be sure to stop back again tomorrow for another Sweet 'n Sassy feature!  Have a wonderful day!

Hugs,
Cathymac

Friday, June 14, 2013

SNSS June 2013 Release


Hello Sweet 'n Sassy friends!  Welcome to a new release by Sweet 'n Sassy Stamps.  Today we are introducing four new stamp sets and two die sets to the Sweet 'n Sassy line up that you are sure to love!  If you follow us on Facebook, you have already seen some beautiful samples made with these new sets, but if not, head on over to the Sweet 'n Sassy Blog to get all the information and see the full reveal of all of these sets.  Be sure to join us for the next four days as we feature each new set in a blog hop.  As you comment on each of the Design Team's blogs, you will have a chance to win a set from the new release!  

At 10:00 this morning, we will also be hosting a challenge on our Splitcoaststampers Member Forum with a chance to win another PRIZE!  So come join us for a fun day of stamping!  

Before you leave, here is a sample using one of the new sets being released this month...It's a Girl Thing!

Creative Nugget:  The Center Step card was made with Sage Shadow card stock and then the fun of decorating each panel with girly things began!  Smokey Shadow card stock and KaiserCraft DP were used to matt each panel.  A combination of images from the It's a Girl Thing stamp set were colored with Copic Markers or paper pieced to add to the panels. Cutting the items was a snap with the matching Girly Girl Dies.  A few pearls and some lace were added for fun and dimension to finish the card.

Thanks so much for stopping by...hope to see you on SCS later today!  Be sure to stop back again tomorrow as we feature this set!

Hugs,
Cathymac

Card Recipe
Stamps: It's a Girl Thing (SNSS)
Ink: Tuxedo Black (Memento), Pumice Stone Distress Ink (Ranger)
Paper: Solar Crest (Neenah), Smokey Shadow, Vintage Cream (PTI), Sage Shadow (SU!), Bundle of Joy Collection DP (KaiserCraft)
Accessories: Girly Girl Dies (SNSS), Glossy Accents (Ranger), Memory Box Dies, Kaiser Pearls, Baker's Twine, Copic Markers

Saturday, June 8, 2013

Shining Light

Happy Saturday, sweet friends!  Hope you've had a good week.  The temperatures here have been mild with low humidity so Kody and I have thoroughly enjoyed our walks each day!  

Saturday has rolled around again, so it's time for another sketch at The Sweet Stop.  Since my nephew is now a new dad, I used the sketch this week to make a Father's Day card for him...his first one!


Creative Nugget:  The lighthouse image and sentiment are from the Shining Light clear stamp set by Sweet 'n Sassy Stamps.  The image was colored with Copic Markers and matted on Cherry Cobbler card stock.  The decorative papers from Fancy Pants Designs' Down by the Shore collection were also matted on Cherry Cobbler.  Just a hint of a wave-like border can be seen behind the lighthouse panel.  All layers were mounted on a Vintage Cream card base.  Some twine, a mini tag, and some pearls finish the card.  This card is making me anxious for our trip to the beach this summer!

The Sugar Babies have more fabulous sketch samples for you...be sure to check them out.  Hope you can join us this week for SSS214 over at The Sweet Stop!

Sugar Babies

                                    Melissa Schultz
                                    Stephanie Serrano

Thanks so much for stopping by...have a wonderful day!

Hugs,
Cathymac

Card Recipe
Stamps: Shining Light, Serene Silhouettes (SNSS)
Ink: Tuxedo Black (Memento), Tea Dye and Tumbled Glass Distress Inks (Ranger)
Paper: Vintage Cream (PTI), Cherry Cobbler (SU!), Down By the Shore DP (Fancy Pants Designs)
Accessories: Mini Tags Die Set (SNSS), Border Punch (ek Success), Kaiser Pearls, Button Twine, Copic Markers BG0000, BG00, R24, R29, R39, R59, R89, Y13, Y15, Y17, YG21, YG63, YG97, E30, E31, E34, E35, C3, C5, C7, C9